This is the same box as the Valentine one..just made a few Easter samples, since I had given the Valentine ones away...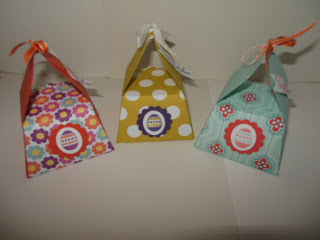


After the papers are cut, they are trimmed on the one side where the ink line is below

You will have two pieces of cardstock/2 of DSP...fold on all the crease lines and trim the one side of each...


You can use sticky tape or tombow if you would like...I am using mine for display only so I used snail to attach the square box pieces...

Make sure the edges match on the folds when you adhere to the bottom..the two pieces will meet close to the center...


The picture below is how it will look before you glue the sides....


Sorry that this is a little blurred...hard to hold the camera and get a shot while waiting for the tombow to dry....have to work on getting the tripod to work...lol

You will then poke a hole with the paper piercer on both top tabs...


I suggest using 1/8 taffeta ribbon or a little wider taffeta ribbon..make sure you cut the ribbon at an angle before trying to get it through the holes at the top of the box...you may have to recut after pulling through...I used between 9-10 inch of ribbon...and trimmed what was left over...if you are craftier, you can probably get by with less than that...
Please feel free to leave me a comment...and any suggestions to make the tutorial a little better (other than my photography...know that needs work)...Have a great day!!
Thanks SO much Fran!!! It's wonderful!!! HUGS Kay Capps
ReplyDelete